Channel User will be in hierarchical model according to its Chain, A user with down level Channel can also be associated with the two level Channel user.
1) Channel User manager allows to manage (add/edit/delete) the users.
On creation a new user under the dealer module, a new Account/Opportunity will be created automatically under the CRM, and this account/opportunity will be associated with the Channel User using a referential key.
2) A Channel User can be deleted only if it is not associated with any reference record.
3) Need to create a hierarchical view for Channel user.
- First Entry in channel User level is mandatory and cannot be deleted it is a factory user.
- We can add new node in the channel user according to channel level.
- Add a new user in a hierarchy
- First is select your hierarchy level.
- Enter Firm Name.
- Select the parent user you can see the work.
- Channel User manager allows to manage (add/edit/delete) the users.
- A Channel User can be deleted only if it is not associated with any reference record.
- See the hierarchical view for channel user.
- Association of Channel User with CRM User.
- Factory User is not assign to CRM User.
- Channel user is single parent but multiple add a child user.
Create Channel User
To create a new channel user in GoERPBaby, go to “More” section and click on Channel Users option available in the Order booking section
When you click on this option, channel user interface appear on your screen. To create new channel user, click on “Create New” Option.
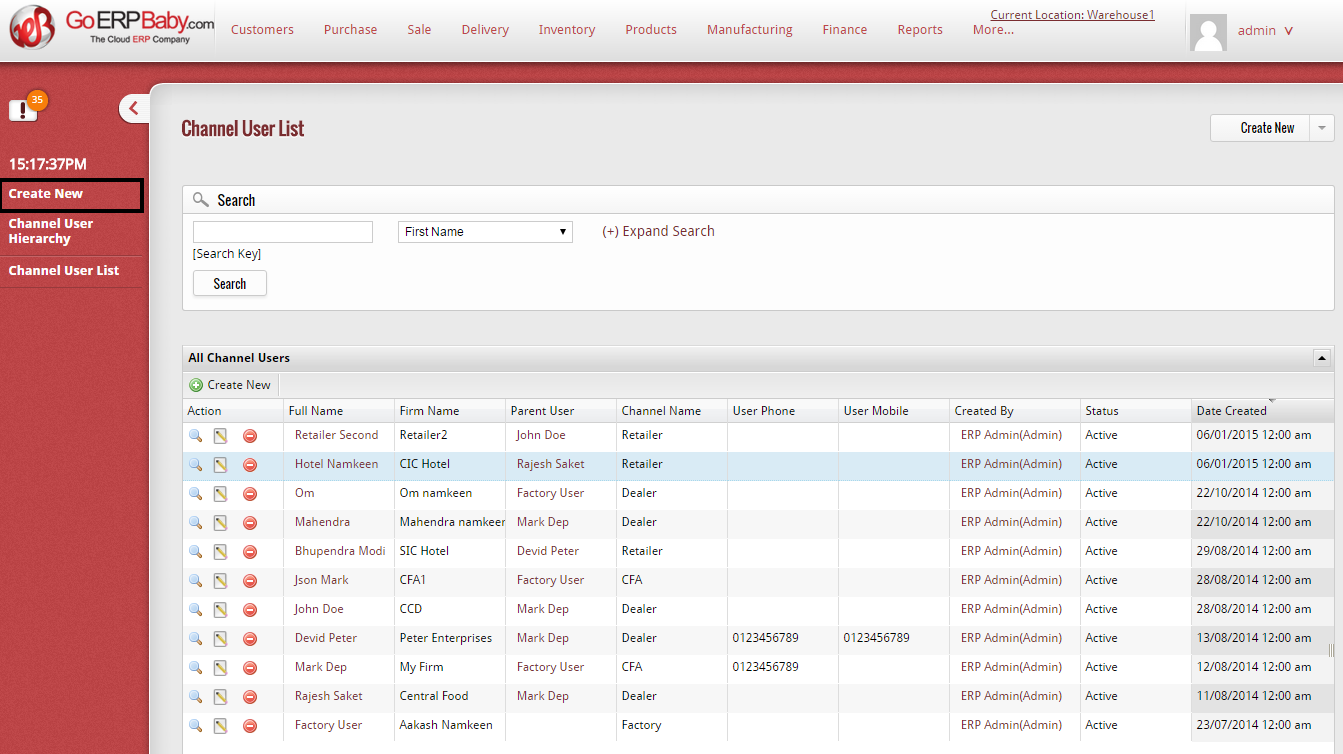
After clicking on the option, a page comes that help you to add a new channel user in the system. You just have to insert some of the essential details of the channel user that include:-
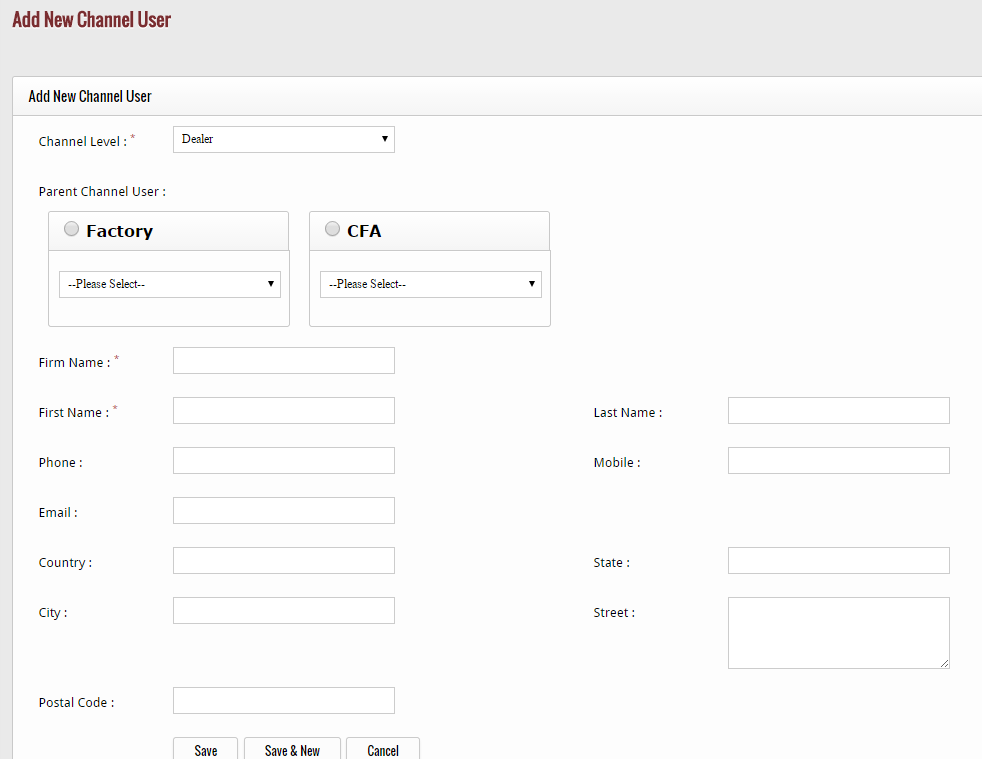
- Select the level of the channel, means whether the channel use is a dealer, CFA or retailer.
- After selecting, choose the parent channel user of the channel user.
- Enter the name of the firm
- Enter the first name, last name, phone number and mobile number of the channel user
- Add the email address, country, state, city, street and postal code of the user.
After adding the details of channel user, click on:-
![]()
Save button– To save the channel user in the system
Save & New button– To save the channel user & again create a new channel user after saving
Cancel button– To cancel and exit from the channel user page